It’s a beautiful Saturday morning. The sun is shining, the birds are chirping, and you’ve got a coffee in one hand and a hose in the other. You’re ready to wash your car and make it look brand new again. But have you ever finished the job, stepped back to admire your work, and noticed something heartbreaking?
Tiny, spiderweb-like scratches dancing in the sunlight. Or maybe the paint looks a little duller than it did a few months ago.
If this sounds familiar, you aren’t alone. The culprit usually isn’t your scrubbing technique—it’s the liquid in your bucket.
Most people assume that “soap is soap.” They grab the bottle of dish detergent sitting by the kitchen sink, thinking they’re saving money. But in reality, that quick kitchen mix is stripping your car’s wax, drying out rubber seals, and slowly ruining your finish.
The secret to a scratch-free shine isn’t just elbow grease; it’s using a dedicated “car wash soap”. Whether you’re a total beginner or a detailing fanatic, understanding what goes into your bucket is the first step to protecting your investment.
Let’s dive deep into the world of car wash soaps, bust some common myths, and walk you through exactly how to get that professional clean right in your driveway.
What Exactly Is Car Wash Soap? (And Why It’s Special)
At first glance, “car wash soap” looks a lot like the stuff you use to wash your hands or dishes. It’s bubbly, it smells good, and it cleans. However, the chemistry inside that bottle is radically different.
“Car wash soap” is a chemically engineered product designed specifically for automotive surfaces. Unlike household cleaners, which are made to strip grease off ceramic plates or sanitise countertops, car soap has three specific jobs:
1. Clean dirt safely.
2. Lubricate the surface.
3. Protect the existing finish.
The Science of pH Balance
You’ll often see the term “pH balanced” on “car wash soap” bottles. But what does that actually mean?
The pH scale measures how acidic or alkaline a substance is.
Acidic cleaners (low pH) are great for removing water spots, but can eat away at clear coats.
Alkaline cleaners (high pH) are heavy-duty degreasers. They strip everything off, including the wax you spent hours applying last month.
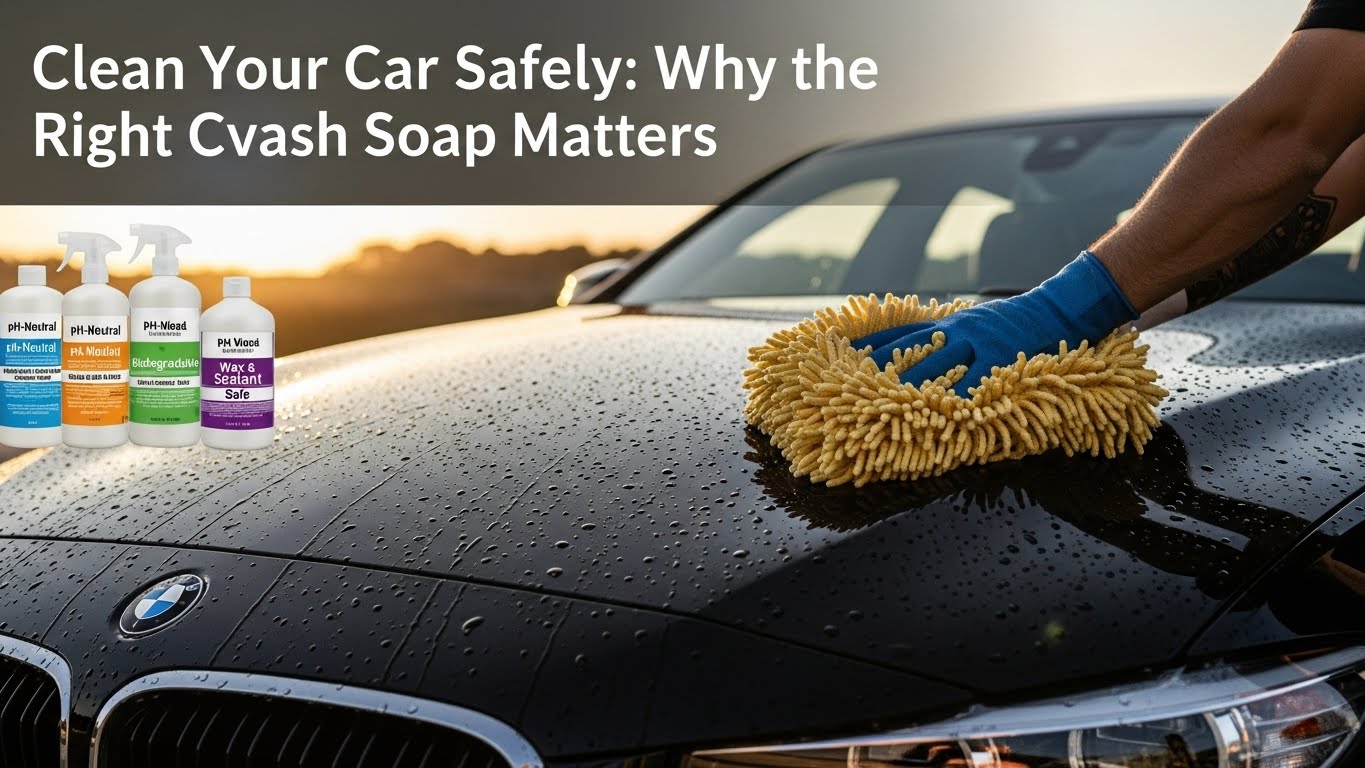
A quality “car wash soap” is neutral (around pH 7). This means it’s gentle. It cleans the dirt without chemically attacking the wax, sealant, or ceramic coating that protects your paint.
The Magic of Lubricity
This is the most important factor that beginners overlook. A good “car wash soap” is slippery. Extremely slippery.
When you drag a wash mitt across your car, you’re technically rubbing dirt against the paint. Without lubrication, that dirt acts like sandpaper. “Car wash soap” contains high-lubricity agents that encapsulate dirt particles, creating a barrier between the grit and your paint. This allows the dirt to glide off safely rather than grinding into the clear coat.
Why Not Just Use Dish Soap? (The Big Myth Busted)
We need to address the elephant in the room. You’ve probably heard your dad, uncle, or neighbor say, “Just use dish soap; it cuts through grease, and it’s cheap!”
While dish soap is an engineering marvel for lasagna pans, it’s kryptonite for cars. Here’s the detailed breakdown of why you should banish the kitchen bottle from the garage.
1. It’s Too Good at Its Job
Dish soap is formulated to break down animal fats and stubborn grease. Car wax and paint sealants are essentially made of oils and polymers—very similar to the “grease” dish soap is designed to destroy. When you wash your car with dish soap, you’re effectively stripping away your car’s UV protection. This leaves your paint “naked” and exposed to the sun, leading to oxidation (that chalky white look) over time.
2. It Dries Out the Details
Cars aren’t just metal and paint. They have rubber window seals, plastic trim, and vinyl accents. Dish soap pulls the moisture and natural oils out of these materials. Over time, this causes your black plastic trim to turn grey and your rubber seals to crack and crumble.
3. Zero Lubrication
Rub a drop of dish soap between your fingers; it feels “squeaky” clean, not slippery. On a car, “squeaky” means friction. Friction leads to swirl marks. A dedicated “car wash soap” feels slick and slimy (in a good way), ensuring your wash mitt glides effortlessly.
The One Exception:
The only time professional detailers touch dish soap is when they want to strip old wax off a car to start fresh. Unless you’re planning to spend the next four hours clay-barring and polishing your car, keep the dish soap in the kitchen.
Types of Car Wash Soap: Which One Do You Need?
Walk down the aisle of an auto parts store, and you’ll see dozens of neon-colored bottles. It can be overwhelming. To make the right choice, you need to know that “car wash soap” generally falls into five categories.
1. Maintenance / Standard Shampoo
Best For: The weekly wash.
What it does: This is your bread-and-butter soap. It cleans moderately dirty cars, offers high lubricity, and smells great. It doesn’t add wax, but it doesn’t strip it either. It’s purely for cleaning.
Who needs it: Everyone should have a bottle of this.
2. Wash and Wax (All-in-One)
Best For: The busy car owner.
What it does: These soaps contain a small amount of wax or gloss enhancers. As you wash, it leaves behind a thin layer of protection. It won’t replace a proper hand-waxing session, but it boosts the shine and extends the life of your existing wax.
Who needs it: If you only have time to wash your car and want it to look glossy immediately.
3. Snow Foam (Pre-Wash)
Best For: Enthusiasts with a pressure washer.
What it does: This soap is designed to be used in a “foam cannon.” It creates a thick, shaving-cream-like foam that clings to the car. You spray it on, let it sit for 5 minutes, and rinse it off before you touch the car. It softens the dirt so you don’t scratch the paint during the hand wash.
Who needs it: Anyone worried about scratches or who wants that cool “snow-covered car” photo for social media.
4. Heavy-Duty / Strip Wash
Best For: Neglected cars or prep work.
What it does: These possess a higher pH level. They’re designed to remove tree sap, road tar, bug guts, and old wax.
Warning: Do not use this for your weekly wash, or you’ll be reapplying wax every weekend.
5. Rinseless and Waterless Wash
Best For: Apartment dwellers or water-restricted areas.
What it does: High-tech chemistry encapsulates dirt so you can wipe it away with a microfiber towel without rinsing with a hose.
Who needs it: People without access to a driveway or hose.
How to Pick the Right Car Wash Soap
With the types defined, how do you actually choose the specific bottle? Here’s a checklist to use while shopping.
Concentration Matters (Value for Money)
Don’t be fooled by the price tag. A cheap gallon jug might cost $5, but if you have to use half the bottle for one wash, it’s not cheap.
High-quality “boutique” soaps might cost $20 a bottle, but they’re hyper-concentrated. You might only need one ounce (a shot glass worth) for a 5-gallon bucket. In the long run, the expensive soap is often cheaper per wash.
Scent and Experience
This sounds silly, but it matters! Washing your car should be therapeutic. Manufacturers add scents like cherry, grape, mint, or citrus. If you hate the smell of chemical cleaners, pick a “car wash soap” that makes the experience enjoyable.
Compatibility with Your Protection
If you’ve paid hundreds of dollars for a ceramic coating (a glass-like hard shell for your paint), ensure your soap is “coating safe.” Avoid “Wash and Wax” products if you have a ceramic coating, as the cheap wax can clog the superior ceramic layer, temporarily hiding its water-beading properties.
The Ultimate Step-by-Step Guide to Washing Your Car
Now that you have the right “car wash soap”, let’s talk about technique. Even the best soap can’t save you if you use a dirty old rag.
Here is the “Two-Bucket Method”—the gold standard for a scratch-free finish.
What You Need:
Your chosen “car wash soap”.
Two buckets (preferably with “Grit Guards” in the bottom).
A microfiber wash mitt (toss that yellow sponge away!).
A large microfiber drying towel.
Step 1: The Wheels First Rule
Always wash your wheels before the paint. Wheels are covered in brake dust, which is essentially tiny metal shavings. You do not want that on your paint. Use a separate bucket and brush for wheels.
Step 2: The Pre-Rinse
Never touch dry paint with a mitt. Rinse the entire car with water to knock off loose dust, leaves, and mud. The more you remove with water, the less you have to scrub.
Step 3: Mix Your Soap (The Two Buckets)
Bucket 1: Fill with water and your “car wash soap” mixture.
Bucket 2: Fill with plain, clean water.
Step 4: The Wash Process
Dip your mitt into the “Soap Bucket”. Wash one panel (e.g., the roof).
Crucial Step: Before getting more soap, dip your dirty mitt into the Rinse Bucket. Agitate it to shake off the dirt. Squeeze it out.
Now, dip it back into the Soap Bucket for fresh suds.
This ensures you’re never putting dirt back into your clean soap water.
Step 5: Top to Bottom
Gravity is your friend. Start at the roof, then the glass, then the hood and trunk. Save the bottom of the doors and the bumpers for last—they’re always the dirtiest parts. If you wash them first, your mitt will pick up heavy grit and drag it across the rest of the car.
Step 6: Rinse and Dry
Rinse the soap off with a gentle stream of water.
Do not skip drying! If you let the car air dry, the minerals in the water will leave “water spots,” which are hard to remove. Use a large, clean microfiber towel. Lay it flat on the surface and gently drag it. No scrubbing!
Advanced Tips for the Enthusiast
If you want to take your “car wash soap” game to the next level, try these pro tips:
1. The Foam Cannon Pre-Soak
If you have a pressure washer, buy a foam cannon attachment. Covering the car in thick suds before you even touch it is the safest way to wash. It looks cool, but more importantly, it pulls dirt off the paint chemically.
2. Wash in the Shade
Sunlight is the enemy of a good car wash. If the surface is hot, the soap water will evaporate before you can rinse it, leaving behind soap scum and streaks. Always wash early in the morning, late in the evening, or in the shade.
3. Use a Drying Aid
While drying, spray a little “spray wax” or “quick detailer” on the wet car. This acts as a lubricant for your drying towel, reducing the chance of towel-induced scratches, and adds an extra pop of shine.
Common Mistakes to Avoid
Even smart people make these mistakes. Avoid them to keep your paint pristine.
Using a Sponge: Old-school yellow sponges are flat. They trap dirt on the surface and grind it into the paint. Use a microfiber mitt; the fibers lift the dirt away from the paint.
Dropping the Mitt: If you drop your wash mitt on the ground, game over. It has picked up tiny rocks and sand. Don’t try to rinse it off. Grab a new one. Is a $10 mitt worth ruining a $5,000 paint job?
Using Too Much Soap: More soap isn’t always better. If you use too much car wash soap, it becomes difficult to rinse off, leading to streaks. Follow the instructions on the bottle.
Circular Motions: When washing, try to move your hand in straight lines. If you do scratch the car, straight scratches are less visible to the human eye than circular “swirl marks.”
Final Thoughts: It’s More Than Just Clean
Choosing the right “car wash soap” might seem like a small detail, but it’s the foundation of car care. It’s the difference between a car that looks aged and worn out after five years and one that looks brand new.
By ditching the dish soap and investing in a quality automotive shampoo, you aren’t just cleaning; you’re preserving. You’re protecting the clear coat, keeping the rubber seals healthy, and ensuring that every time the sun hits your vehicle, it shines rather than showing off scratches.
So, next weekend, put the kitchen detergent back under the sink. Go out, get a soap that smells like cherries and foams like crazy, and give your car the spa day it deserves. Your paint will thank you.
Read More: How Much to Wrap a Car with Style